A Step-by-Step Guide to Achieve the Perfect Smoky Eye
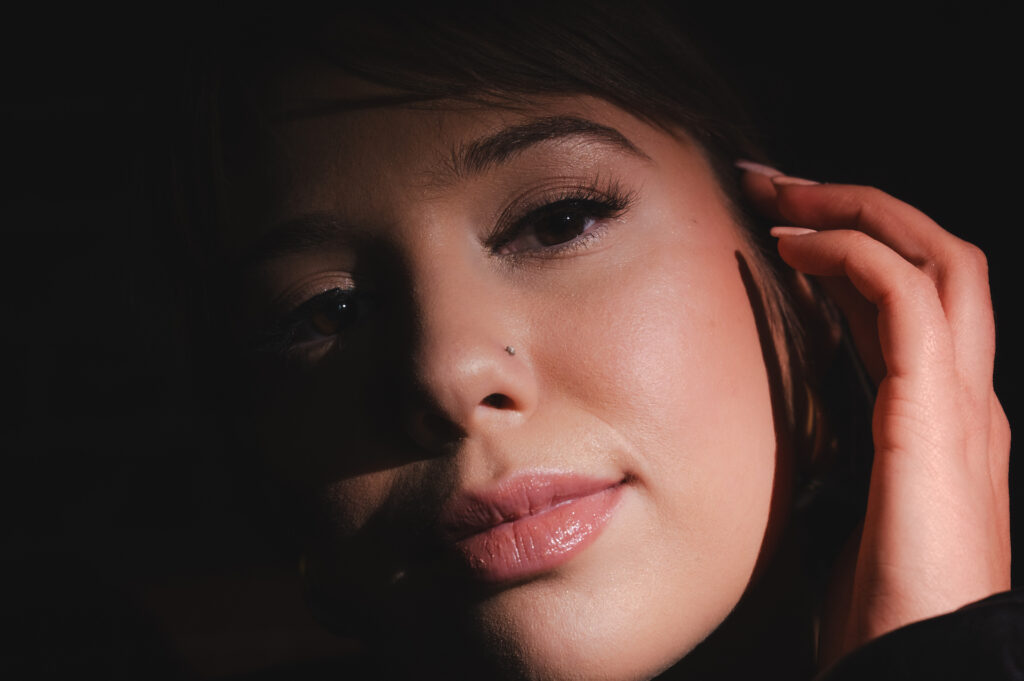
Who doesn’t love a really well done smoky eye makeup look? If done correctly, it’s one of the most iconic looks. And having done it hundreds of times in my makeup career, it never gets old. A well done smoky eye look is perfect for those special date nights or when you want to add a little something different to your normal every day makeup look. It truly is a classy choice every single time. But how do you achieve the balance of sultry and smudge without looking like you have a giant black eye? I’ve got you covered with my easy-to-follow guide to mastering the smoky eye look.
1. Properly Clean Your Eyelids and Face
Before you even think about applying your favorite eyeshadows, you need to make sure your lids are clean and ready for the products. Start with a gentle eye makeup remover to remove any dirt or makeup from yesterday’s look. Once your lids and face are clean and dry, it’s time to put on your favorite eye primer to ensure your eyeshadow lasts all night without creasing.
Pro Tip: For oily eyelids, use a mattifying primer to keep your shadows in place for even longer.
2: Build a Base with a Neutral Shadow
We’re building from the ground up. For your smokey eye to really pop, you need a solid foundation. I recommend using a neutral, matte eyeshadow that’s similar to your every day skin tone. You want make sure you apply it all over your lid, blending it into the crease. This helps set your primer, making it easier to blend your darker shades later on in the application.
Check out one of my favorite eyeshadow palettes right here.
3: Shade Selection
Now it’s time to decide what kind of smokey eye you want to create. The most common are the traditional blacks and grays, or you can switch it up with a brown smoky eye, burgundies, or even navy for a more unique look. The key to a smokey eye is layering shades, so here’s how to build your smokey eye:
- Dark Outer Corners: Using a dark eyeshadow (black, deep brown, or gray), apply the shadow to the outer corner. This is your “smoke” part, so start small and build up. Use a fluffy brush to properly blend the shadow inwards and upwards into the crease.
- Lighter Inner Lid: To avoid your eyes looking too harsh, apply a lighter shade on the inner part of your lid. Think champagne, gold, or light brown. This will give your eyes some depth and keeps your eyes from looking too closed off.
- Smudged Lower Lash Line: Smudging your lower lash line with your darkest shade helps connect the upper lid with the bottom, giving the eye a more sultry, rounded look. I recommend using a pencil eyeliner to trace the bottom lash line and then smudging it out with a small brush.
Quick Tip: Find a palette with endless options such as this one.
4: Be Sure to Blend for the Perfect Smoky Eye
The most important part of a smoky eye is the blending. This is where the magic happens. After applying your dark eyeshadow, use a clean blending brush such as Bellame’s eye brush #5 to go over the edges, diffusing any harsh lines. The goal is to make your eyeshadow look seamless, with no visible lines. The more you blend, the softer and more sultry the look becomes.
Pro Tip: When blending, use a light hand and small circular motions.
5: Add Definition with Eyeliner
Once you’ve created the perfect smokey eye base, it’s time to define your eyes with eyeliner. For a classic look, use a black pencil or gel liner to line your upper waterline. You can also apply liner along the top lash line, creating a thin to thick line depending on how dramatic you want to go.
For extra impact, smudge the liner slightly with an eyeliner brush to add to the smokey effect.
Shop my favorite Eyeliner right here.
6: Add Lashes for the Ultimate Drama
The smokey eye look is all about intensity, and nothing adds more intensity than a pair of false lashes. Choose lashes that add volume and length, but that still complement the smoky look without taking over. Lashes like Tread Beauty’s Classy or Luxury Lashes are perfect for adding volume and definition while still looking natural.
Carefully apply your lashes ensuring that they’re securely in place with a high quality, Latex free adhesive such as Tread Beauty’s Clear Adhesive. Once they’re on, feel free to go back in with your eyeliner to cover the lash band.
7: Apply Mascara to Complete the Look
The final step in your smokey eye look is to finish with a coat of mascara on both your top and bottom lashes. This helps blend your natural lashes with your false lashes and gives your eyes a bold, wide-open effect.
Pro Tip: Use a waterproof mascara to keep everything in place, especially if you’re planning to wear your smokey eye look for an extended period of time.
8: Double Check Your Edges
Lastly, to really perfect your smokey eye, clean up any fallout or excess product under your eyes with a makeup wipe or a cotton swab. You can also apply a light dusting of translucent setting powder to catch any fallout during the application process.
Time to Make it Your Own
There are so many variations of the smokey eye, and it’s all about experimenting with colors and shapes. Ultimately you want to find what you like and what fits your style. Whether you prefer a soft, everyday smokey eye or a bold, dramatic look, this technique can be adapted to suit any occasion.
If you’re looking for the perfect lashes to complement your smoky eye look, check out Tread Beauty’s entire collection for a variety of glam lashes that add the ideal finishing touch. And be sure to improve your false lash application skills by following this detailed guide.
Ready to master the perfect smoky eye? Give these tips a try, and soon you’ll be a smokey eye pro!